Moving a WooCommerce catalog between sites involves complex database relationships. A single variable product relies on connected records across post meta, taxonomy terms, and media tables to keep variations, galleries, and custom attributes linked properly.
Default WooCommerce CSV importer frequently fails on complex variable products. An incomplete export easily decouples product variations or wipes out custom field data across your store.
In this article, we’ll show you how to export and import WooCommerce products between sites using WooCommerce product export and import plugins that package your catalog into an automated migration bundle, keeping every variation, image, and custom field intact.
Migrating WooCommerce products between stores requires moving data accurately without breaking database relationships. Several plugins handle catalog data, but coordinating an export with a matching import is where most store owners run into errors.
The most reliable approach is to use the WP All Export plugin on your source site and the WP All Import plugin on your destination site:
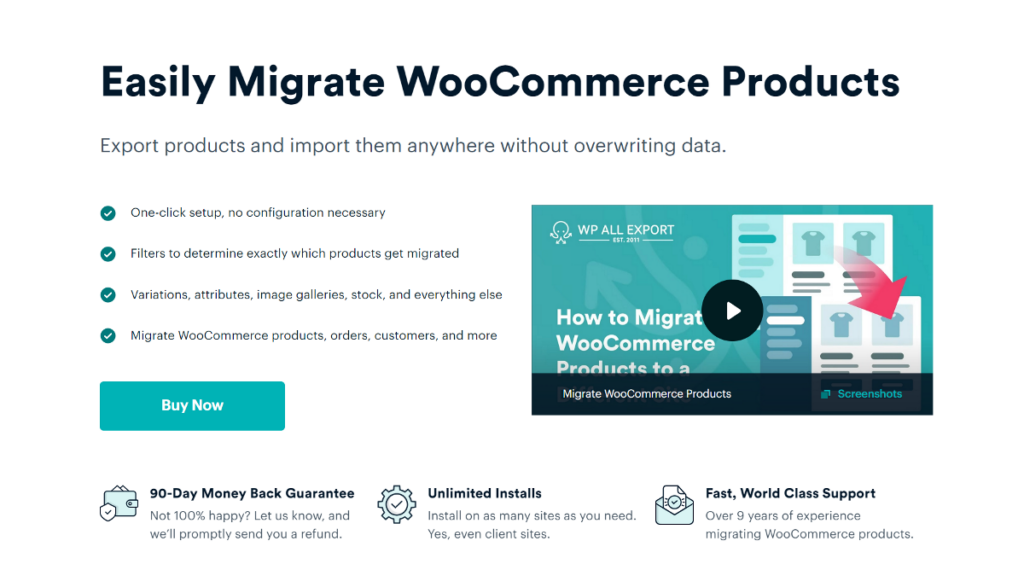
We will break the migration into two different sections: exporting products from your source store, then importing them into your destination site.
For the export phase, the WP All Export plugin gives you complete control over catalog data. It extracts standard WooCommerce fields, third-party plugin metadata, and variable product structures into an automated migration package.
Here is the step-by-step process for exporting products from your source site.
WP All Export requires the WooCommerce Export Add-On to recognize store-specific data types like product variations, attributes, stock statuses, and gallery images.
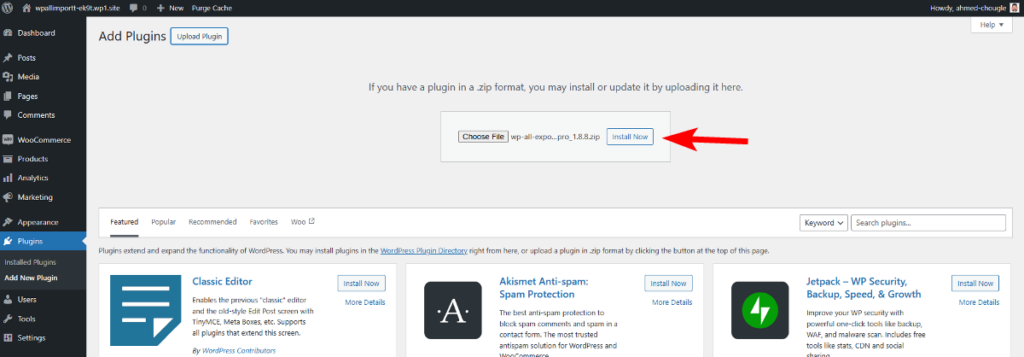
Once activated, start the export process:
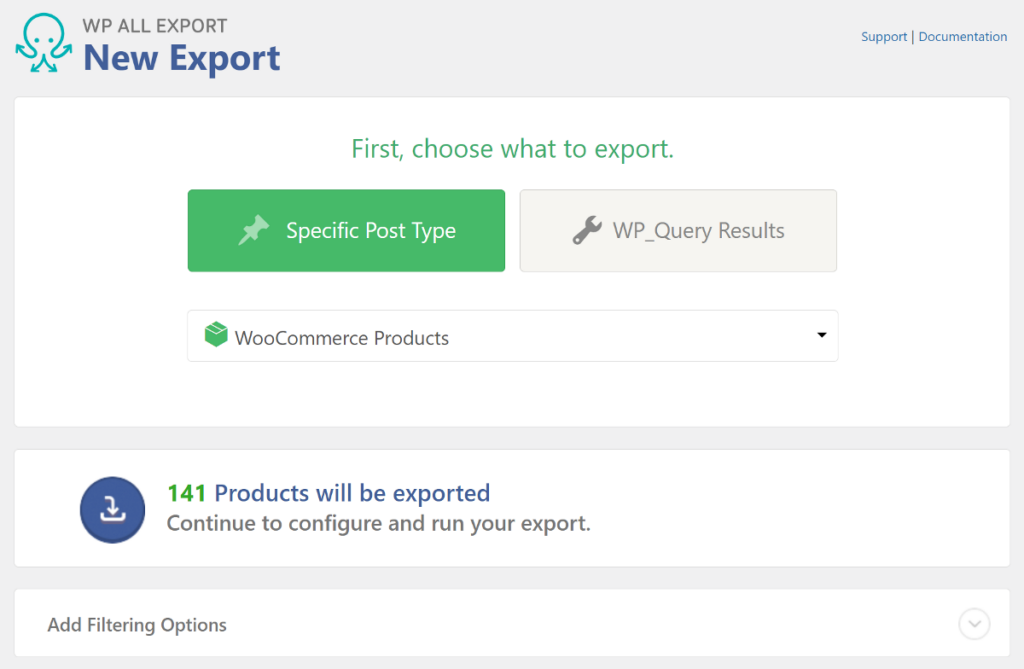
The plugin scans your catalog and displays the total number of products detected on your store.
If you only need to migrate a specific subset of products, expand the Add Filtering Options panel:
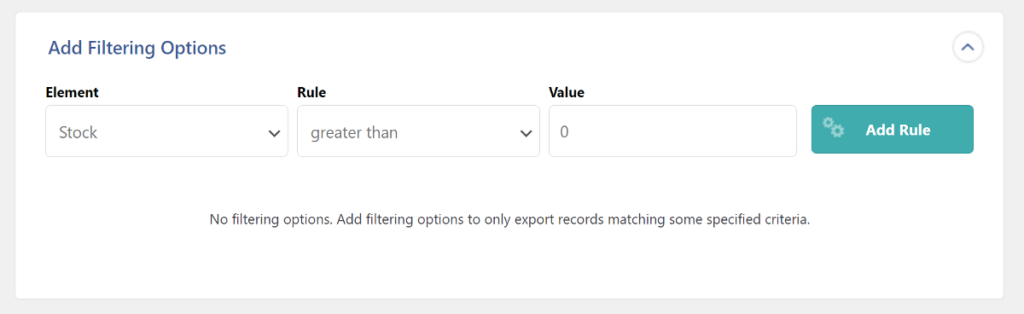
You can combine multiple criteria using AND and OR logic to filter products down to exact inventory groups before exporting.
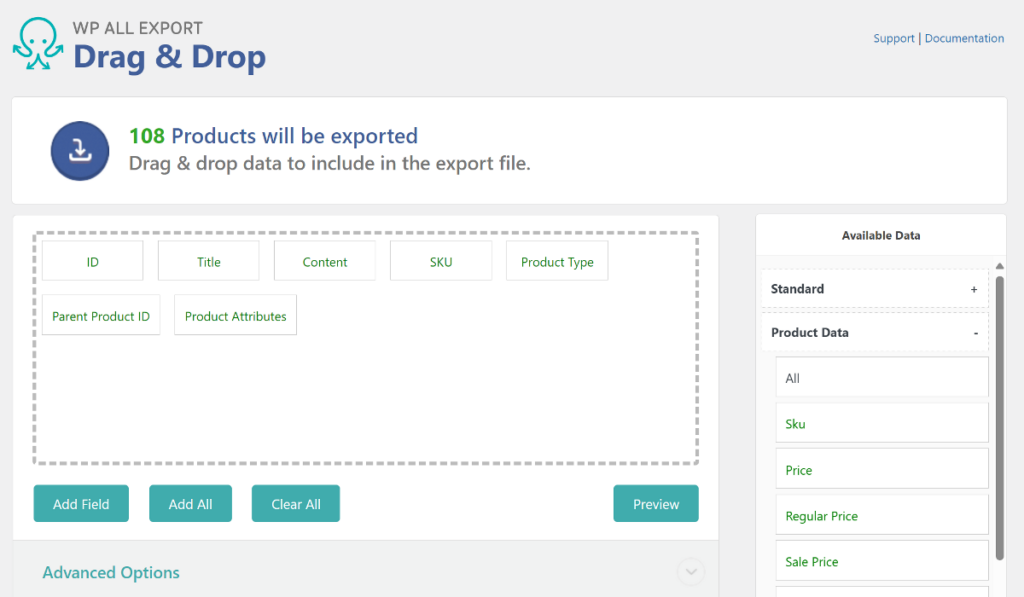
Click Customize Export File to open the drag-and-drop export interface. The right-hand panel organizes your catalog data into logical sections, including Standard, Media, Attributes, and Custom Fields.
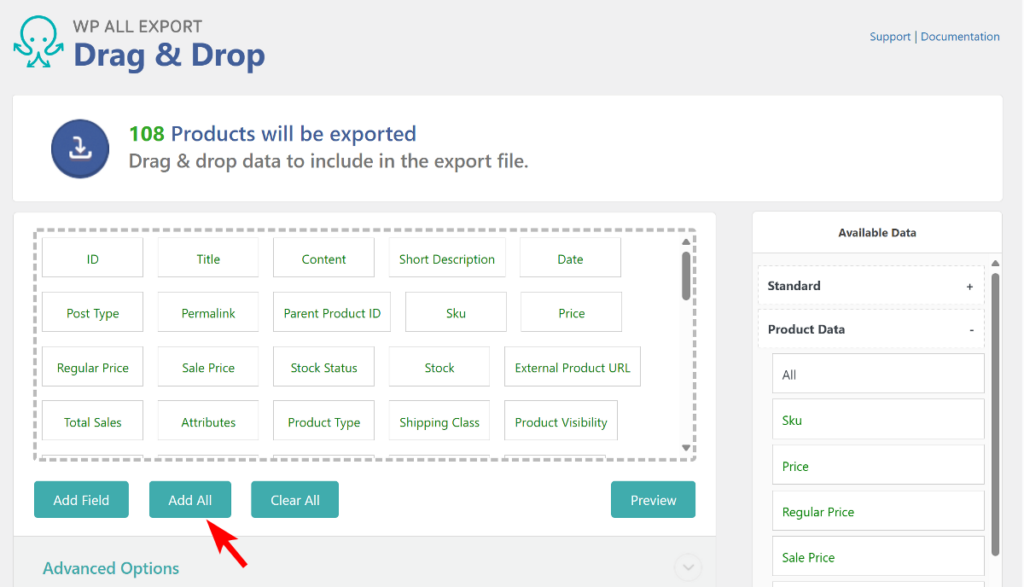
Because we are migrating products to another store, click Add All at the bottom of the column list. This ensures every product field, image link, taxonomy term, and custom meta key is included in the export file.
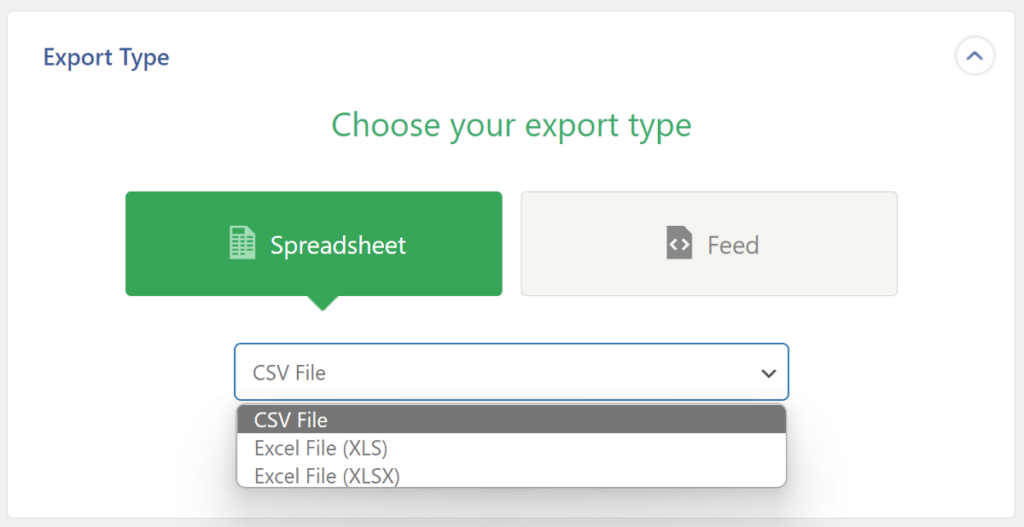
Under the Export Type panel, you can choose between spreadsheet formats (CSV, Excel) and XML feeds. Keep the format set to CSV for standard product migrations.
Click Continue to review export settings, then click Confirm & Run Export. The plugin processes your catalog rows in batches to prevent server memory overloads.
When the export finishes, the download screen provides two options:
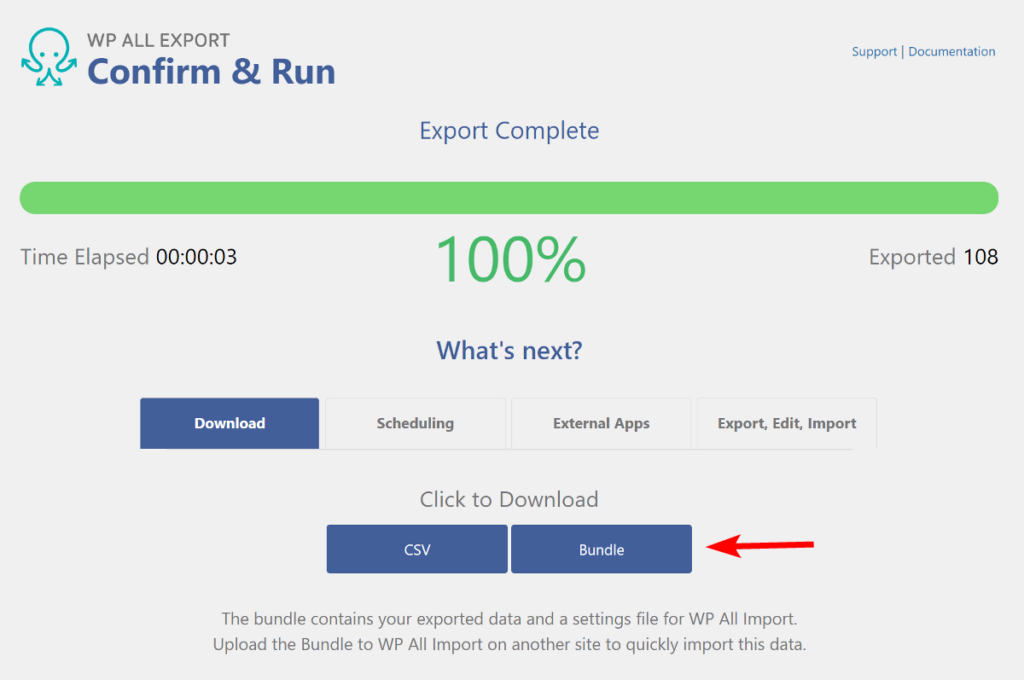
Click the Bundle button to download the zip file to your computer. This migration package eliminates manual column mapping on the destination store.
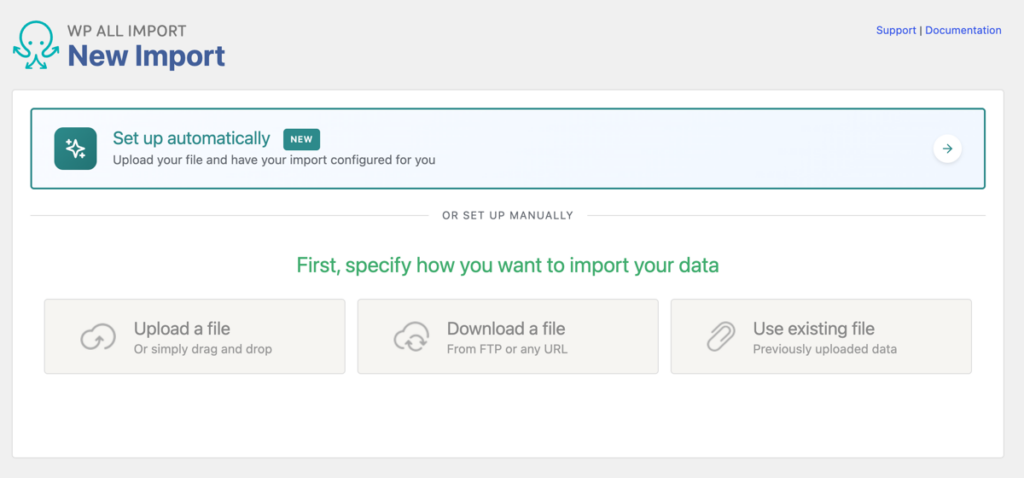
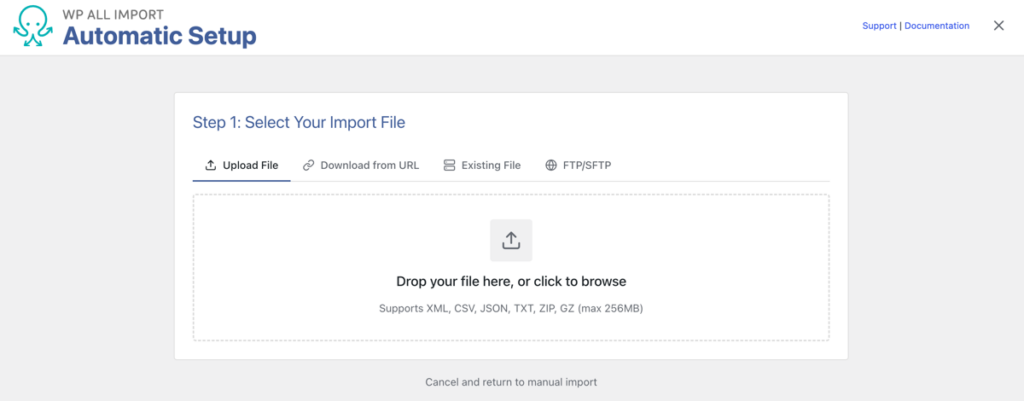
On the destination website, the WP All Import plugin processes the migration file. Its automated setup workflow reads the migration bundle and configures product relationships without requiring manual field mapping.
Here is the step-by-step process for importing products into your destination site.
Before importing, install the companion plugins on the destination site:
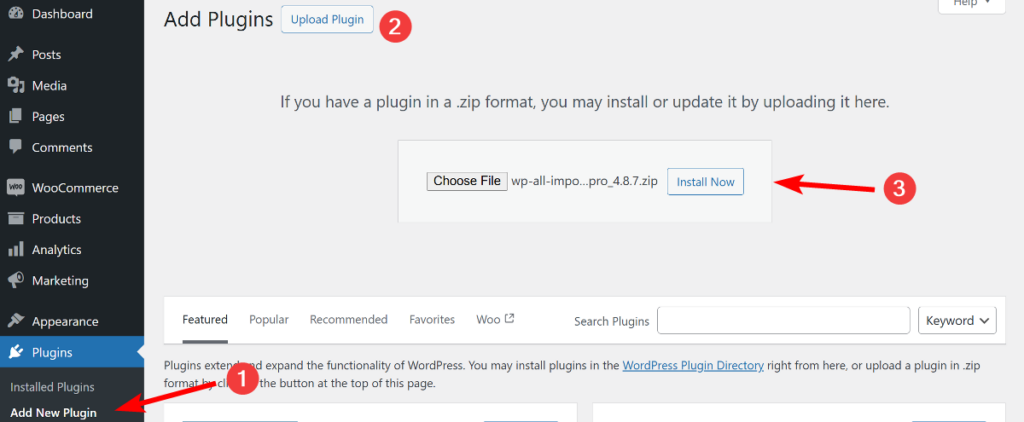
To start the import:
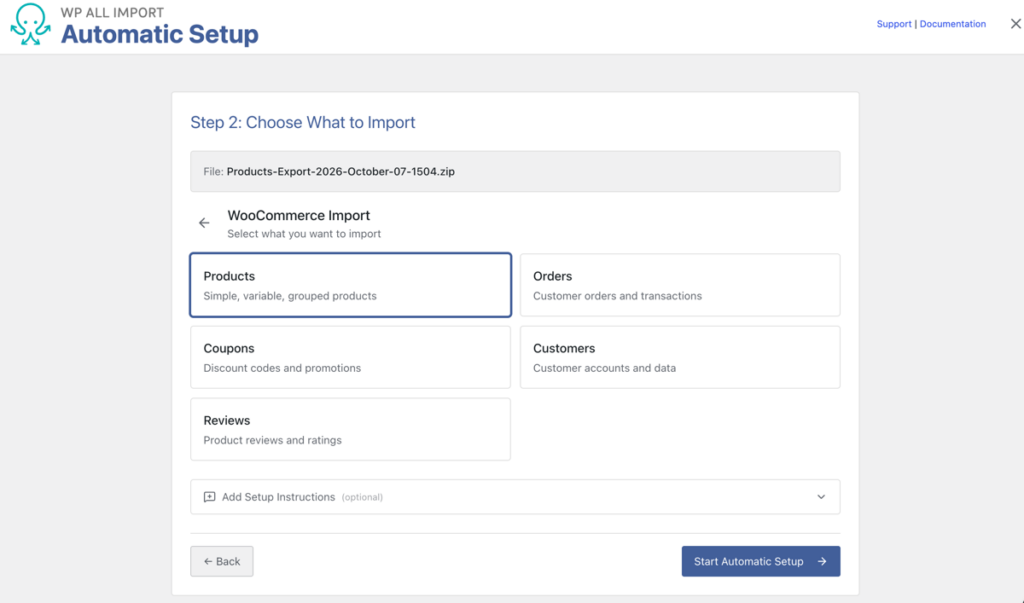
If you have specific instructions for how product fields should be processed, expand the optional Add Setup Instructions box to enter plain English guidance.
Click Start Automatic Setup. The plugin extracts the package, matches the catalog schema, and configures all field relationships.
As the migration bundle includes a pre-configured template, WP All Import automatically populates all product fields and opens directly into the template editor.
You do not need to drag and drop elements manually. You can review the pre-configured sections to verify your catalog structure:
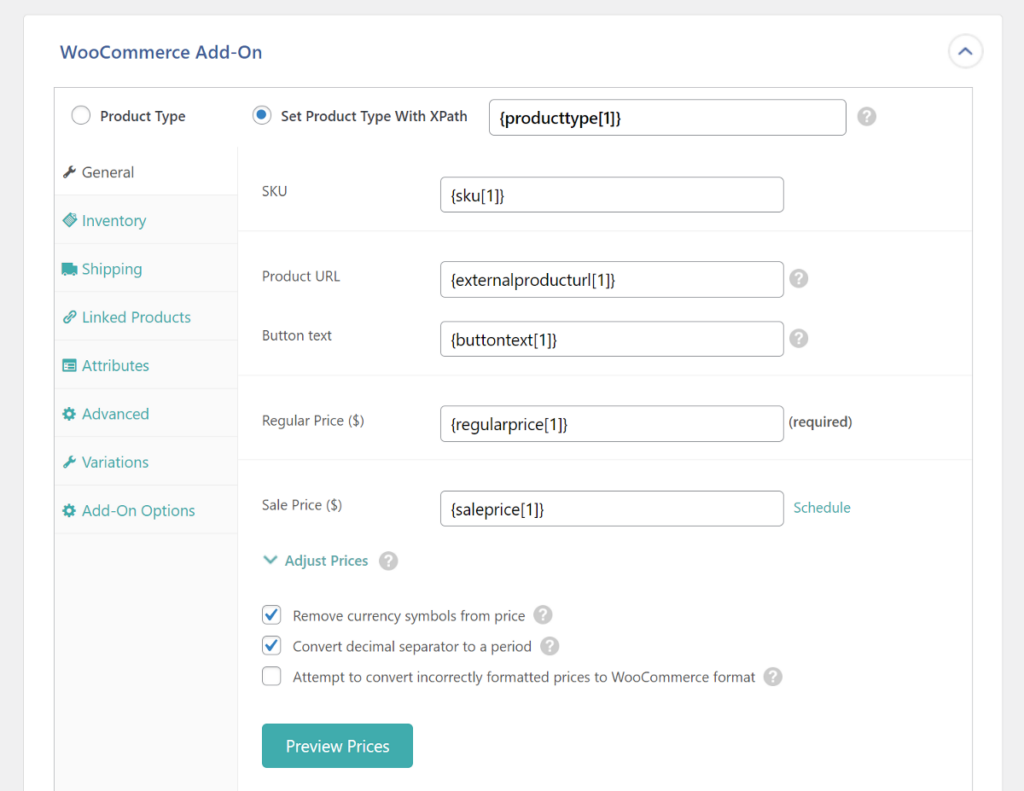
Once you have verified that your catalog settings are mapped accurately, scroll down and click Continue to Import Settings.
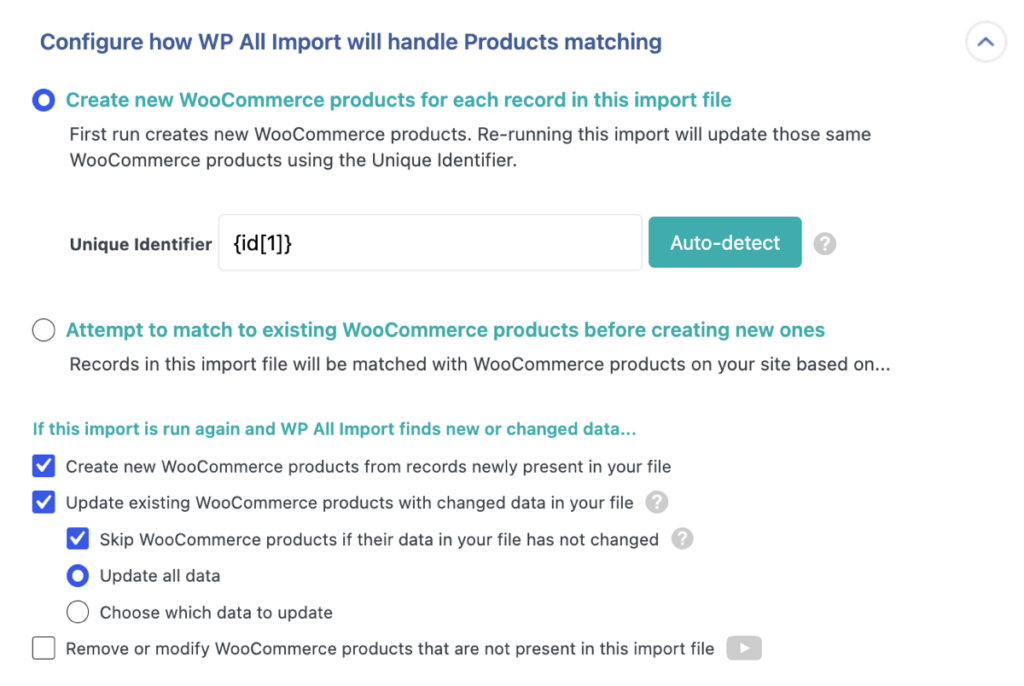
The next screen configures how the plugin distinguishes between individual products in your database. Because you are using a migration bundle, the Unique Identifier is assigned automatically. The plugin uses this unique key to link simple products and pair child variations to their exact parent records without creating duplicates.
This step also controls record handling rules. If you are migrating into an existing catalog, you can specify whether to update existing products, add new items, or delete records missing from the file. For a fresh store migration, leave the default settings intact, then click Continue to move to the final confirmation screen.
The final screen displays a complete summary of your import, including your target post type, file name, and total record count.
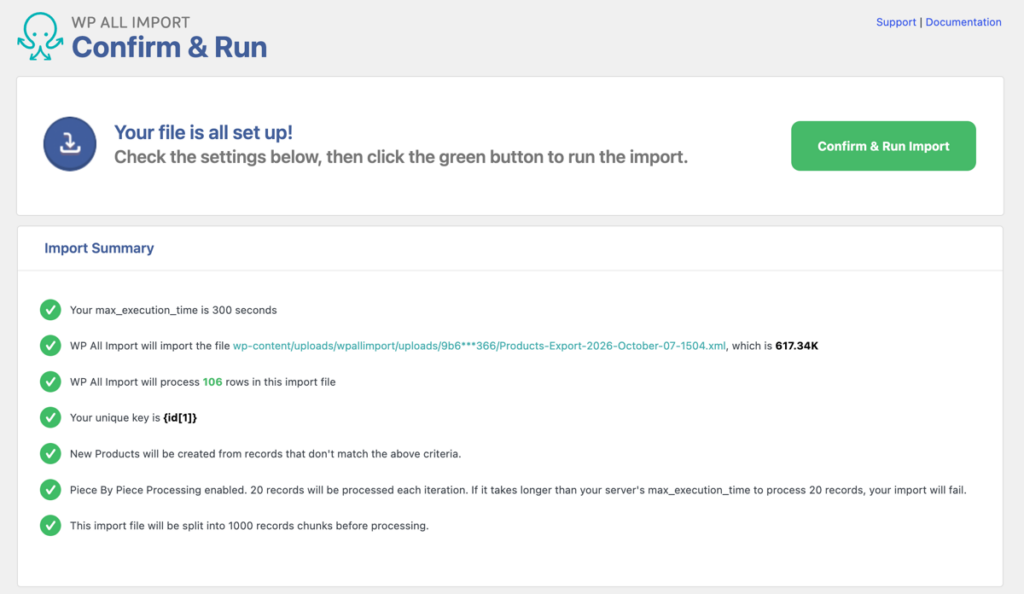
Click Confirm & Run Import to start the process. WP All Import executes the import in managed batches, downloading gallery images, generating variation combinations, and updating stock tables without triggering server timeouts.
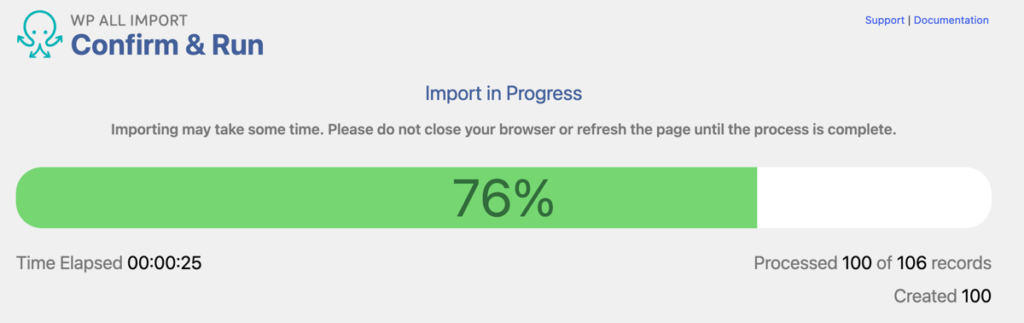
When the import finishes, navigate to Products › All Products in your WordPress dashboard. Open a few simple and variable products to confirm that prices, variation dropdowns, image galleries, and custom attributes display correctly across your store.
Migrating WooCommerce products with the default CSV tool often leads to broken variations, lost image attachments, and missing custom fields. Manual database imports require hours of spreadsheet adjustments to match parent-child relationships and taxonomy terms.
WP All Export and WP All Import provide the easiest way to export and import WooCommerce products by packaging complete store data into an automated migration bundle. The WP All Export plugin compiles product records, attribute hierarchies, gallery URLs, and custom meta keys alongside a pre-configured import template. On the destination site, the WP All Import plugin detects the bundle file, maps catalog fields on upload, and updates database tables without manual column selection.
This hands off your catalog straight to the template editor with all settings populated, letting you confirm pricing, variation hierarchies, and media rules in seconds. Running the import then reconstructs your products in safe background batches, ensuring every child variation, image gallery, and custom field appears on your new store exactly as it did on the source site.
How do I export specific products from WooCommerce?
WP All Export filters products by category, stock status, date, or price using conditional rules. Expand the Add Filtering Options panel during export setup, select your criteria, and click Add Rule to export only the matching catalog items.
Can I migrate variable products between WooCommerce sites?
Yes. WP All Export and WP All Import preserve parent-child product relationships during migration. The export bundle includes all attributes, variation SKUs, and stock quantities, automatically reassembling variable products on the destination site without manual configuration.
How do I import WooCommerce products with custom fields?
WP All Export captures all post meta keys registered by plugins like Advanced Custom Fields, Meta Box, and Yoast SEO. When importing on the destination site, WP All Import detects these meta keys automatically and maps them to their corresponding custom fields.
What is a WooCommerce product migration bundle?
A migration bundle is a specialized zip file generated by WP All Export containing your product data and an import template. When uploaded to WP All Import, the plugin reads the template instructions and maps all catalog fields automatically.
Can I export and import WooCommerce orders and customers?
Yes. Both plugins support complete WooCommerce migrations, including orders, customer accounts, reviews, and coupons. You can follow the same bundle workflow by selecting WooCommerce Orders or WooCommerce Customers during export and import setup.

